
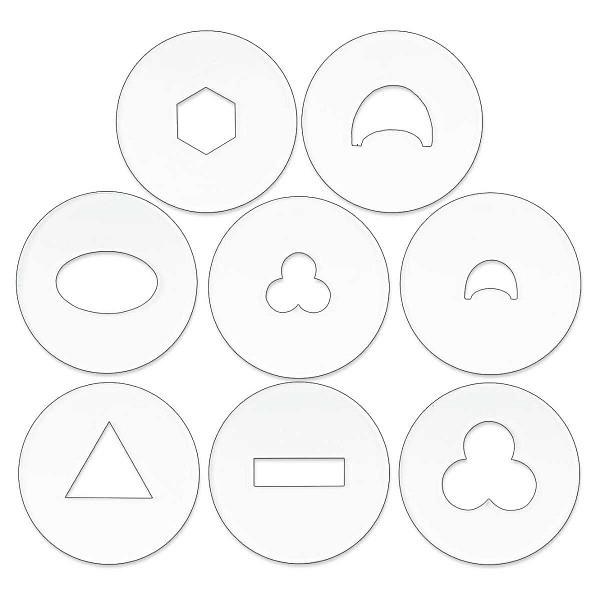
Clay Gun Shapes & Coils Die Set- 8 PC
Item#: SC035
- The Scott Creek Clay Gun Shape and Coil Die Kit features a variety of use coil shapes.
- Included with the Shape and Coil die kit are two specific coil dies that allow you to easily stack your coils for building and then blending.
- The clay gun handle die kit is excellent for all scales of production potters and hobbyists too.
- Perfect for making large runs of specific shapes for consistent results.
- Simply load the extruder with clay, install your die in the cap and squeeze!
- These sturdy acrylic dies will fit both the Super Duper Clay Gun and our XL Clay Gun extruder models. Built to last a lifetime.
** We always recommend extruding with soft clay to limit the strain on yourself and on your extruder and dies.
* The die shapes may be altered to your taste with a variety of tools such as a small file, a drill, dremel/multi-tool to create your own unique die shapes. Please use caution and wear protective gloves, mask and eyewear when working with plastics.
Download Printable Clay Gun Instructions Here
Super Duper Clay Gun
Fun and simple tool for making handles, coils and tile trims of many shapes and sizes.
Learning to use a clay gun can significantly improve the quality and consistency of your work and ‘wow’ your customers. We hope you enjoy!
Basic Operation – Clay Gun:
Step 1: Remove the BLACK END CAP (1) from the BARREL (2). Using your thumb, depress the PLUNGER RELEASE TAB (4) and pull the T BAR PLUNGER (3) back.
Step 2: Load SOFT CLAY into the front end of the BARREL (2). The more clay you load, the more you can extrude. Pinch off the excess clay near the opening.
Step 3: Select your die profile and stick it to the clay at the end of the barrel. Carefully thread your BLACK END CAP (1) back on. You are now ready to extrude!!!
Step 4: Find a comfortable position to hold your clay gun. Tip: Try holding the clay gun vertical to avoid creases. While holding the HANDLE (5), squeeze the TRIGGER (6) to begin extruding clay in a pumping-action.
Once completely expelled, repeat steps 1-4.
IMPORTANT
Over-advancing the plunger results in a build-up of pressure and causes the clay gun to jam. This could be a pain if you are on a deadline. This problem typically occurs when the user does not realize they are out of clay. If this happens, carefully tap the PLUNGER RELEASE TAB (4) with a hammer to relieve the pressure.Using hard clay will break acrylic dies and end caps. Remember to always use soft clay!
Share:
Share on Facebook Share on Twitter Share on Pinterest Tell a friend